Thursday, December 16, 2010

The 2011 color is...

The hot new fashion and home trend for 2011 is the color honeysuckle, a vibrant pink!
My understanding is this trend will be combined with warm and cool colors to create a global palette. 


Interesting enough when I was in the 6th grade around the age of 11, I requested (or the real truth I begged until I wore my poor mother down)  to paint my room what was then called magenta. 
(For the record, magenta is a brilliant purplish pink, honeysuckle is a vibrant redish pink.)

Regardless, a color very similair to honeysuckle.  My mother finally gave in but she informed me that if I ever wanted to repaint the room that I would have to do the work myself.  Yes,  I kept my word and repainted the room years later.  My childhood bedroom experience was both exciting and memorible because this was my first paint color choice EVER. Looking at all the updated photos bring back lasting memories. 

I hope they inspire you!


Look at this room, can you believe how powerful the entire room is in honeysuckle.  This decorator even included the window coverings!  Note that there's no pink present in the furniture (at least in the photo), I love the touches of cobalt blue with the pink.

hsroom120810.jpg

If the over all wall color is a little too much for your taste, pick up the new color in accessories.  Here is an example of a throw on the end of the bed bringing out the color in the art work and bedding.


I've painted my share of walls but my magenta room will alway rate as one of my all time favorites.
             It's a happy color and you will always feel like your at the "party"!
Give honeysuckle a try and party like you've never partied until 2011!
                       

Saturday, December 11, 2010

Christmas

Our house is beginning to feel like Christmas, the tree is up and we are busy shopping for those we love.   In our home the theme is "lots of lights".  On every branch we wrap our tree with tiny clear lights and then top it off with white and silver ornaments. The abundance of sparkle from our tree provides us joy and delight in antipation of this year's Christmas spirit! 


The Christmas trend for 2010 are bowls, vases, candle holders of every size, shape, and style produced in mercury glass. 


I selected votive candles from Pottery Barn to tuck in and around the garland to give an updated look.
The tea lights are lit to bring the beauty of Christmas to our home.


What is your Christmas theme? Keep in mind when making your selections your decorations will look best if displayed in 3's or odd numbers. This will give balance that's pleasing to the eye. A tree looks best if you select 3 different ornaments in quantity.

 While I was in our attic pulling down our decorations, I was thrilled to find this 25 year old treasure, a sock monkey made by our children's great grandmother!


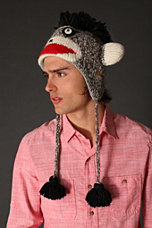
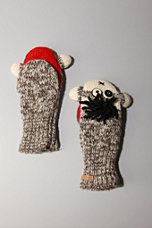
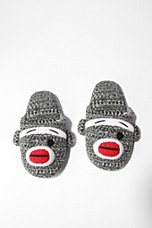
The sock monkey is having a rebirth, currently at Urban Outfitters you can purchase a sock monkey hat.


View Product


View Product


View Product

I was curious if I could find a sock monkey pattern and low and behold I found sockmonkey.com.  
  I think I'll make sock monkey's for childrens Christmas gifts!


HOW TO MAKE A SOCK MONKEY

INSTRUCTIONS:

• Turn sock inside out.

• Sew a seam (A) 1/2" on both sides of center of sock starting 3" from the white of the heel and across the end of top. Cut socks between seams and to within 1-1/2" of white heel. This leaves an opening in crotch.

• Then turn sock so seams are inside and use crotch opening to stuff head, body and legs.

• ARMS:

• Cut the upper part of the sock into two pieces. Seam, rounding ends and stuff the arms.

• MOUTH:

• Cut the heel from the sock, leaving a brown edge around the white. Fasten on lower part of the face, whipping around the bottom; stuff and finish sewing around the top. The mouth can be improved by running stitch of either black or white across the middle of the lips.

• TAIL:

• Cut a 1" strip, taper to end of cuff on length of front of sock. Seam and stuff.

• EARS:

• Cut the ears from the remaining brown part of the sole of the sock.

• EYES:

• Sew on moving eyes; buttons, felt, or embroider with black thread. (For very small children embroider eyes.)

• There are many variations from this basic pattern. Decorations can be either pompons, yarn or bells. Jackets, vests and skirts are also used for clothing the monkey.

MATERIALS:

• One pair Rockford Red Heel Socks.

• Stuffing-cotton batting or polyester fiber.

• Red knitting yarn.

• Black embroidery thread.

• All purpose thread.

• Buttons for eyes (optional)

• Straw hat (optional)


The history behind the sock monkey:
The Red Heel® socks where first manufactured in 1890 by The Nelson Knitting Mills in Rockford Illinois. John Nelson came to this country from Sweden in 1852 with the Swedish immigrants stepping off the train in Rockford. The first sock knitting machines were patented by him in 1869. Incorporated in 1880, The Nelson Knitting Co. was the first company world wide to manufacture socks. These sturdy and comfortable work-socks were worn mainly by farmers and factory workers.


In the 1900's mothers started crafting these socks into sock monkeys and other animals for their children. These quality sock were intended and used as work socks, but they became so much more when the Sock Monkey was born. In 1920 Nelson Knitting Mills started to include the directions for the Sock Monkeys with every pair of red Heel® Socks.

Nelson Knitting Mills was purchased by Fox River Mills in 1992 and now Fox River Mills continues the tradition and includes the original directions with every pair of Red Heel® Socks they manufacture.

Let me hear from you.  What are your family traditions & what are you making this year?

Thursday, December 9, 2010

Natalie Jean

Our daughter Natalie Jean has been recently inspired by the fabulous Sea of Shoes blogger Jane Aldridge. 


Jane and her mother Judy Aldridge have recenctly had their home remodeled
 with the assistance of Sam Reitmaryer-Sano from Style/Swoon


Natalie has found this bedding at Anthropologie in hopes to recreate this fabulous vintage style.


In addition she has purchased these two adorable owl lamps from Target to go on either side of her bed.


Have you made a change lately?  If so, please let me hear from you.

Sunday, December 5, 2010

Inspiration .....

Velvet and Linen shows a simple burlap and twine as an inexpensive and charming way to wrap a plastic plant container. I will be purchasing a yard of burlap this week. Let me know what has inspired you recently!


Sunday, November 28, 2010

Giving Thanks

What an amazing time we shared during our Thanksgiving holiday! With having our newlyweds Blake and Meredith home for the weekend it was important to prepare our favorite family recipes.  While they are easily accessible I have documented them for future festivities.   

A week before Thanksgiving I started with preparing the family cheese ball.  This is an easy recipe and something that you can make ahead of time.  I typically make many and freeze.


REINETTE'S CHEESE BALL

Folks have been known to eat an entire cheese ball at one sitting!


1/3 square blue cheese
1/4 lb. Velveeta cheese
2 small pkg. cream cheese (or 3/4 of a large pkg)
green onions chopped
chopped pecans


Combine blue cheese, Velveeta and cream cheese, add the green onions and mix with an electric mixer until smooth.


Roll all the ingredients into a ball, then roll the ball into chopped pecans.


Either refrigerate or wrap tightly and freeze for unexpected company or your next event.


BAKED POTATO CASSEROLE


6 potatoes ( recipe calls for Idaho)
2 cups shredded cheddar cheese ( I like sharp)
1 stick butter
2 cups sour cream
1/2 chopped green onions
salt and pepper


Cook potatoes in the skins until tender, (they're done once you can insert a fork into the potatoes) pull the potatoes off the stove and refrigerated until cool.  Once the potatoes are cooled peel and shred them coarsely.  In another bowl mix your cheese and melted butter.  Then add the prepared potatoes.  Add onion and season with salt and pepper, add sour cream and mix.  Put in a greased baking dish and sprinkle the top with paprika.  Bake at 350 for 30-40 minutes.


JOHNNIE'S GREEN BEANS

The first time I had this recipe was at Aunt Lauren and Uncle Steve's rehearsal dinner in Topeka, Kansas. They were prepared by Steve's mother, Johnnie Drenner, this recipe I have been asked for the most often.

2 cans green beans
6 strips of bacon - fried crisp
1/2 cup of vinegar
1/2 cup sugar
1/2 tsp. salt
1 onion


Fry bacon, in bacon fat add 1/2 cup of vinegar, 1/2 cup sugar,1/2 teaspoon of salt.  Pour over beans and slice an onion thinly over the beans and then crumble bacon.

Set on the stove until ready to serve.  It's best when fixed several hours ahead of time to let the flavors mix.


THANKSGIVING STUFFING -


The smell and taste of this dish can only bring back fond family memories of Thanksgiving and Christmas in San Antonio.  There are many little steps to make this special stuffing but well worth the effort!  Kudo's to Heidi for keeping the tradition alive for so many years....

The key to making this moist stuffing is to use the stock to mix and top the entire mixtue with the gravy.

Ingredients:

2 large celery chopped fine, divided
Equal amount of finely chopped onions, divided
2 sticks butter
1 batch biscuits
1 batch cornbread
salt and pepper to taste
Stock (this can be canned, approximately 2 quarts, 2 - 32 oz)
sage to taste - (2 tablespoons - fresh)
2 cups flour
Kitchen Bouquet
raisins - optional

2 DAYS AHEAD

BISCUIT BATCH


2 cups of flour
4 teaspoons baking powder
4 tablespoons Crisco (or butter)
1 teaspoon salt
1 cup milk

Mix all ingredients together, bake in a greased baking dish at 375 for 25 minutes.


CORNBREAD BATCH


1/4 cup of veg.  oil
1 cup yellow cornmeal
1 cup flour
2 - 4 tablespoon sugar
4 teaspoon baking powder
1/2 teaspoon salt
1 cup milk
1 egg - beaten


Combine all the dry ingredients then pour the oi, milk and egg together.
Bake in a greased baking dish at 400 degrees for 20 to 25 minutes.


1 DAY AHEAD:

Chop celery and onions and put in separate bags.


BROTH

Take out giblets.  Put with 1/2 celery and onions.  Fill large (2 plus quarts) pan with water and make broth.  Use the tops of celery.  Simmer 4-5 hours.  (you can do this early and refrigerate)


THANKSGIVING DAY

Start preparing the stuffing 2 hours before dinner.  Saute 1/2 onions and celery until clear.  Crumble the biscuits and cornbread together. 


Crumble biscuits and cornbread together


Put sauteed onions and celery in cornbread and biscuits and mix,  add sage (2 tablespoons, fresh), salt and pepper to taste.  Add enough turkey stock to make it moist.  Divide in half, and add raisins in one of the halves.


GRAVY


1 stick butter, 1/2 of the celery and onions and saute.  Pour 1/2 cup of turkey juice, 1 1/2 cups of flour and some broth.  Strain the flour and broth mix into celery and onions.  Mix, add more flour if needed.  Darken with Kitchen Bouquet.  Salt and pepper to taste. Simmer.  Add more broth if it cooks down too much.


Pour gravy over stuffing and bake until bubbling at 350 for 30-40 minutes. 

CHERRY PIE

"Sweet, thick and full of cherries, this pie is irresistible.  The filling is whipped up from a classic combination of canned sour cherries, sugar, flour and almond flavoring."

Ingredients:

1 recipe pastry for a 9 inch double crust pie
1 (20 ounce) can pitted sour cherries
1 cup white sugar
1/3 cup all-purpose flour
1/8 teaspoons butter
1/4 teaspoon red food coloring (optional - I did not use)
1 egg yolk

Directions:

1. Preheat oven to 425 degrees.  Make pastry and refrigerate.
2. Drain cherries, reserving 1 cup liquid.  In a saucepan combine sugar, flour and salt.  Stir in cherry liquid and bring to a boil, stirring often.  Reduce heat and simmer for 5 minutes.  Mixture will thicken


3. When mixture is thickened, add butter, almond extract, food coloring and cherries.  Cover and refrigerate.
4. On lightly covered surface, roll out half of the pastry into an 11 inch circle.  Put into 9 inch pie dish.  Roll other half of pastry into another 11 inch circle.  With a knife or pastry wheel, cut eight 1/2 inch strips.
5. Pour cooled cherry filling into pie dish.  Place pastry strips horizontally, then vertically,across the top of the pie and lightly brush with egg yolk.


Bake 30 to 35 minutes, and cool before serving.


GIVING THANKS

I find myself being grateful for the smallest of things these days.  I know how very lucky I truly am. I cherish the smiles, the laughter and just being together.... It was almost perfect, but we missed our Natalie...


Happy Thanksgiving.........


Wednesday, November 17, 2010

BRIE, APPLE and ARUGULA QUESADILLAS

    Close


Very delicious and a new favorite of mine!! Recipe from October Cooking Light magazine, I found it on Judy Aldridge blog, Atlantis Home.

BRIE, APPLE and ARUGULA QUESADILLAS

1 tablespoon Dijon mustard
2 teaspoons apple cider
3 (10 inch) flour tortillas (white or whole wheat)
6 ounces Brie cheese, rind removed and cut into 1/4 inch thick slices
1 fuji apple, cored, peeled and cut into 1/4 inch thick slices
3 cups arugula
3/4 teaspoon freshly ground black pepper


Combine mustard and cider in a small bowl; stir well.


Open face


Heat a large nonstick skillet over medium heat. Spread each tortilla with about 1 1/2 teaspoon of the mustard mixture. Place one tortilla mustard side up, in pan. Arrange one-third of cheese slices over half of tortilla; cook 1 minute or until cheese begins to melt. Arrange one third of apple slices over cheese; top with 1 cup of arugula. Sprinkle with 1/4 teaspoon pepper.

Fold tortilla in half, press gently with a spatula.

Skillet

Cook 2 minutes on each side or until golden brown. Repeat process with remaining two tortillas. Cut each finished quesadilla into 3 triangles.

Served with tomato soup and your in heaven!

Enjoy!!!

Tuesday, November 16, 2010

Chipotle Corn Soup Recipe

Chipotle Corn Soup
There’s no better way to celebrate fall than with this silky, cream-free corn soup. Smoky chipotles help balance the sweet corn for a satisfying vegetarian soup you can serve hot or cold. We couldn't resist, we added a little crumbled bacon on top.  The soup is sweet and rich with flavor.

It's easy to make and can warm you up on cool nights.  ahhhh....sweet Kansas corn!


Game plan: This soup can be frozen for up to 2 weeks in an airtight container. Freeze the 1/2 cup of corn kernels separately. Defrost both the soup and the kernels in the refrigerator. Purée the soup in a blender to emulsify. Rewarm it if desired, then stir in the corn kernels and garnish with scallions.

 
  • 8 ears white or yellow corn, shucked
  • 2 tablespoons unsalted butter (1/4 stick)
  • 1/2 teaspoon minced chipotles in adobo sauce ( i found these located with the chili's in a can)
  • 2 teaspoons kosher salt
  • Freshly ground black pepper
  • 6 scallions, thinly sliced (white and light green parts only) (green onions)
  • 1 1/2 cups whole milk
  • 1 1/2 cups water


Rotate the cob and continue until all the kernels have been removed; discard the cob. Repeat with remaining corn. Discard the paper towel. Set aside 1/2 cup of the kernels.


Remove corn kernels from the cobs: Place a large container on a damp towel. Fold a paper towel into fourths and place it inside the container. Stand one ear of corn on the paper towel, using the stem as a handle. Using a paring knife, slice downward, letting the kernels fall into the container. Rotate the cob and continue until all the kernels have been removed; discard the cob. Repeat with remaining corn. Discard the paper towel. Set aside 1/2 cup of the kernels. Melt butter in a large saucepan over medium heat until foaming. Add chipotles, 1/2 teaspoon of the salt, a pinch of black pepper, and about two-thirds of the scallions. (Set aside the remaining scallions for garnish.) Cook, stirring occasionally, until onions have softened, about 3 minutes. Add corn kernels, remaining 1 1/2 teaspoons salt, milk, and water and stir to combine. Increase heat to medium high and bring mixture to a gentle boil. Reduce heat to low and simmer until flavors meld and corn is crisp and tender (not mushy), about 15 minutes. Set a fine-mesh strainer over a large, heatproof bowl. Using a blender, purée the soup in batches until smooth, removing the small cap from the blender lid (the pour lid) and covering the space with a kitchen towel (this allows steam from the hot soup to escape and prevents the blender lid from popping off). Pour the blended soup through the strainer, pressing on the solids with a rubber spatula; discard the solids. Stir in the reserved 1/2 cup corn kernels. Season with salt and pepper as needed. If serving chilled, refrigerate the soup until cold, at least 3 hours. Garnish with remaining scallions and serve.


Enjoy!

Sunday, November 14, 2010

Burlap Inspiration Board


I created my inspiration board for my study (Natalie's room).  I used Natalie's old burlap bullentin board that we created years ago.  I restretched
 it and then framed it with an old frame.  The burlap is a
coarse cloth woven and provides great texture.


Wednesday, November 10, 2010

Mr. and Mrs. Blake Krause

“I give you my heart. I have no greater gift to give.”

Our daughter Meredith was marrid on November 5th, 2010 to our new
wonderful son-in- law, Blake Krause.  
I take this opportunity to share our celebration and our favorite photos taken by Nichols Photography


The beautiful bride, Meredith


The “first look” photo shoot in the meadow before the ceremony


The handsome groom, Blake


The amazing wedding party, Jaime, Chase, Elissa, Trey, Natalie and Jessica


Meredith's dress with her gorgeous bouquet


The wedding ceromony setting


Our beautiful daughters, Meredith and Natalie


Here we go!


Here comes the bride!


What a proud Daddy


It was a wonderful ceremony


You may kiss the bride


Oh happy day!


and then we celebrated


Vista West Ranch was decorated in all her glory


The bride and groom danced the night away....


One more Daddy/daughter dance......


Our precious Daddy Billy


This is my favorite photo of Blake


A truly magical night


They're marrid!


For more infomation on Meredith and Blake's wedding and vendors you may go to Southern Weddings were they were featured, Southern Weddings Part 1 and Southern Weddings Part 2

Congratulations Meredith and Blake!